|
BUILDING A STRIPED S-STYLE, Page 2 |
|
BUILDING A STRIPED S-STYLE, Page 2 |
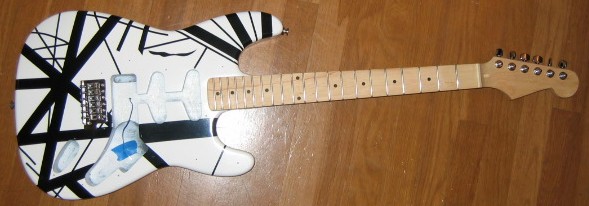
| Step 6:
We clear-coated the body with Dupli-Color clear. Pretty standard stuff, but it is
important to note that there doesn't seem to be as much paint in these cans as there are
in the ReRanch nitro cans. We sprayed a can, and were not that confident in the coverage. We level-sanded the body with 220 and sprayed another half a can. After drying for a week, we wet sanded and buffed the body. The body turned out very, very shiny. We don't believe the actual VH guitar looked this good! The Dupli-Color really buffed out great, and it was pretty surprising considering the paint's low price and availability. Here is a shot of the body after buffing with the bridge installed and the neck attached. Safety Tip: Take plenty of time to attach the necks on these guitars, particularly if you buy a neck from one source and the body from another. Even though everything may look great, the two don't always match. Install the outer two E strings and ensure that the neck and body are aligned before you start drilling holes. I also recommend this for Saga kits. |
|
 |
|
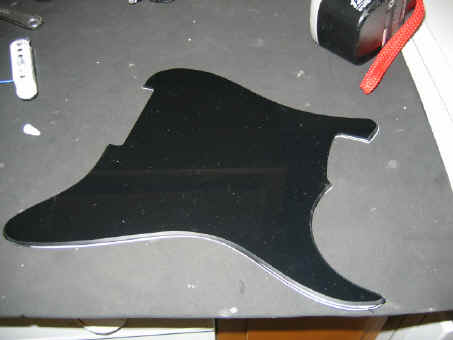
| Step 7: Prepare the
Pickguard Mr. Van Halen's guitar had a black pickguard. So where do you get one that hasn't been drilled for any holes? Pickguards.com, that's where. We had to pay extra to get a pickguard with no holes (?), but it was worth it. A standard Fender guard wouldn't fit the body using the existing holes. We had to do lots of measuring and looking to ensure the holes were correct. Here is a shot of the new guard taped to the old guard to ensure that the screw holes were aligned. Next, it is time to drill. The key to the pickguard is to get the pickup hole right. Remember -- Eddie attached the pickup directly to the body, and it was not attached to the pickguard. More to follow on this. |
|
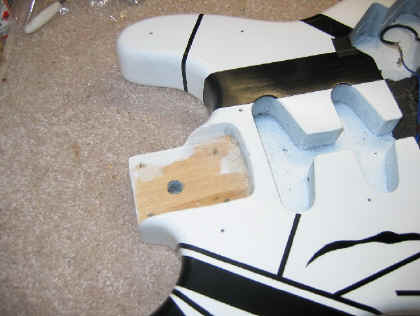
| Step 8:
String 'Er Up. We mounted a Gibson humbucker (as a mock-up) and decided to string the guitar up. We had to glue in two pieces of mahogany to mount the pickup on, and we doubt there will be any tone penalty. Guess what? Once we got the guitar strung up we found that the neck was too high in the neck pocket. How could this be? Easy -- there are a number of manufacturers, and it literally is like a box of chocolates -- you never know what you'll get. The bridge saddles were at their max height and we barely got it playing...time to do something drastic. We did some analysis and found that we had to take about .10" out of the neck pocket. We used our Dremel tool with a straight bit to route out the neck pocket. Careful here -- any slip could ruin your axe. Once the pocket was done we had to do a little touchup. This gave us the chance to build our final pickup. |
|
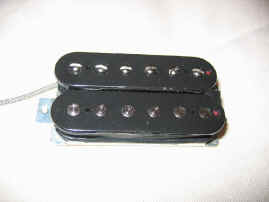
| Step 9:
Build an AttackBucker We've heard the folklore about Eddie's humbucker. According to tribal lore, it was a Gibson PAF out of an old ES-335. What to believe! What we do know is that we weren't about to pay $120 for a Duncan Custom when we had the technology to wind our own. This little jewel, fastened semi-securely in our Test Guitar, is our take on Mr. Van Halen's pickup. Based on all of the research we've done, and lots of trial and error, we believe the AttackBucker is the closest approximation out there for a brown sound. We have a sound file available on Page 3...you be the judge. |
|
|
|
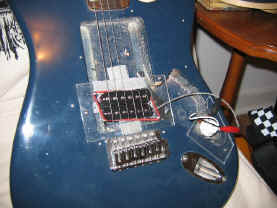
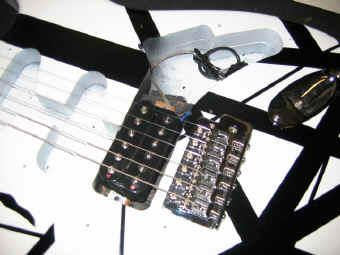
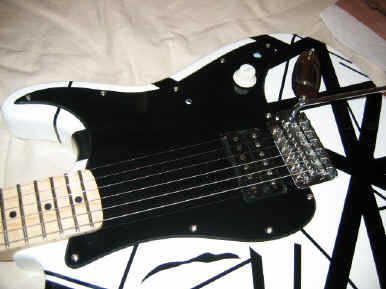
| Step 9:
Finish the Pickguard We've drilled the mounting holes for the pickguard, but we have to get the pickup in and aligned before we know where to route its opening. The top photo is of the "guts" of the guitar. Here is the AttackBucker mounted direct to wood. How does that work? We had to build a little platform of mahogany to mount the pickup on. Sand... measure... sand...measure. Without the traditional springs you have to ensure the pickup height is right before you install it. Once we got the pickup in we started measuring for the pickup route. This took a while, and also took plenty of filing and sanding on the plastic. We decided to keep the strings on, so we just slid the pickguard under them....a bunch of times! Once it was cut, we wired it up and installed a 500k pot. Not much to discuss here -- very simple wiring. Remember -- the pickup is not attached to the pickguard. The bottom photo shows the finished pickguard. Based on the photos we've seen, this is very refined compared to Mr. Van Halen's guitar. Almost ready to rock! |
|
|
|
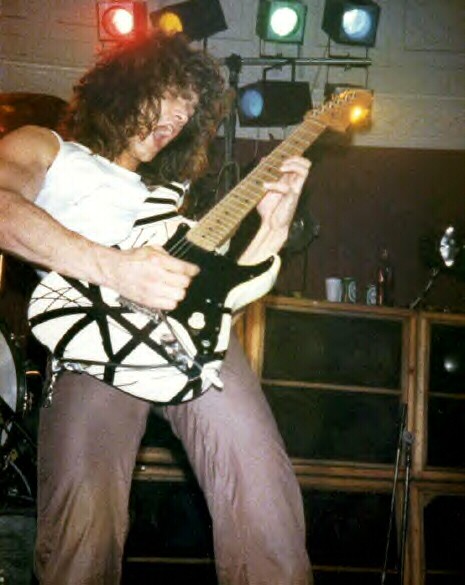
| Here is another good shot of the
old school Mr. Van Halen rocking on the Strat. The relevance of this photo is to
show the position of the extra hole on the pickguard, and the fact that you can see white
paint through the hole. You may not be able to see it, but Mr. Van Halen actually had a Gibson logo decal on the headstock of this guitar. (Revised: See Page 4 for more information on this subject) Click the photo to see it full size. |
|
| ATTACK HOME | BUILDER'S GALLERY | ||||||||||||||||||||||||||||||||||||||||||||||||||||
|
|||||||||||||||||||||||||||||||||||||||||||||||||||||