|
The Spare Parts Les Paul |
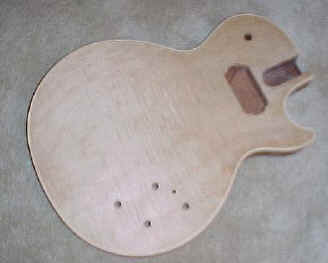
January 1999 This is a photo showing the route for the front humbucker. We routed this before installing the neck because we were concerned that we couldn't get the template close enough to the body for a clean cut. You can see the wiring channel is already drilled. |
|
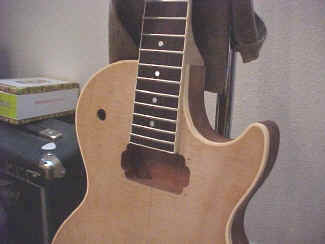
| A shot of the successfully attached the neck! As you can see here, we installed a maple spacer to get the neck above the flat body. We got a nice clean joint, and luckily the front humbucker cavity is nicely aligned. The next steps -- route the other pickup cavity, drill holes for the bridge and tailpiece, and finish it up! |
|
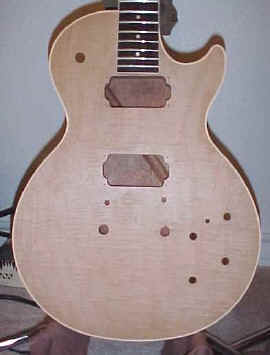
| March 1999 This is a shot showing the route for the back humbucker and the holes for the bridge and tailpiece. We used Stew-Mac's humbucking template and one of their pattern-following router bits. |
|
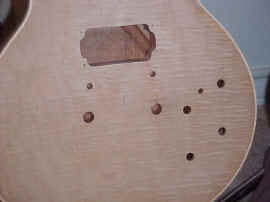
| A close-up of the route and holes. You can also see how close the mini-switch hole is to the volume knobs. I had thought about patching the hole, but I knew I couldn't hide it under a transparent finish. I plan to use a Duncan humbucker with 4-conductor wiring; a mini-switch will give me some sound options. We bought the pickups on sale during a trip to Phoenix...more on the sound later. |
|
| ATTACK HOME | BUILDER'S GALLERY | ||||||||||||||||||||||||||||||||||||||||||||||||||||
|
|||||||||||||||||||||||||||||||||||||||||||||||||||||