| Note from
GuitarAttack: This is a great story!
 Check
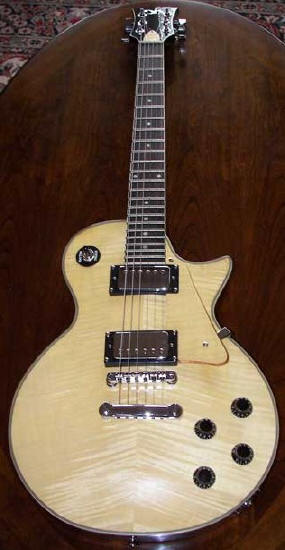
out the custom walnut knobs and pickup rings Chris made for this LP Style.
Click here to see the
story. Check
out the custom walnut knobs and pickup rings Chris made for this LP Style.
Click here to see the
story.
From
Chris Knowles
at CK Custom Guitars
Here's my story, and I'm stickin' to it. Enjoy!
I've been playing guitar now for over 33 years, but never got around to
going electric. I'd settled my heart on a Gibson Les Paul, however given my
budget constraints, I had a choice of an el-cheepo copy, or a Saga kit. The
kit idea turned my crank and sounded like a lot of fun!
First order of business was to do some research, what's out there and what
do I look out for. The Saga saga's and Mattocaster pages at Guitar Attack
really helped and gave me many good pointers which were put to good use once
my LC-10 arrived in the mail.
After stripping the nasty sealer off the Les Paul body, I assembled it and
gave it a basic set up. All of the electronics worked, and the tone was
pretty good.
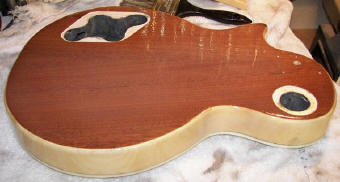
I stained the sides and back of the body with a mixture of walnut and
mahogany stains from Minwax, then hit it with about 18 coats of clear,
sanding and smoothing between each coat. My mistake was using a brush on
Minwax clear which never went perfectly level. I resorted to a spray bomb
Minwax fast drying clear, for the last 6 coats, much better.
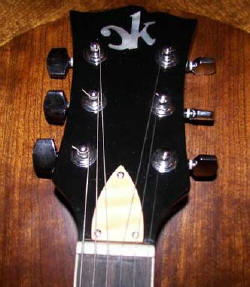
The neck was a different story, I made a mock up of the head stock out of
wood from an old skid, and experimented with creating an inlay. I made a
"Mother of aluminum siding" logo of my own design. Once I was happy with the
concept, I attacked the Headstock for real, and inlayed a Mother of Pearl
version of my logo. My routing job wasn't perfect, but once the gaps were
filled in, it looks very professional.
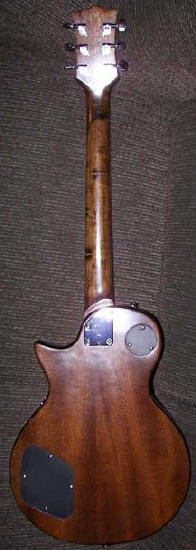
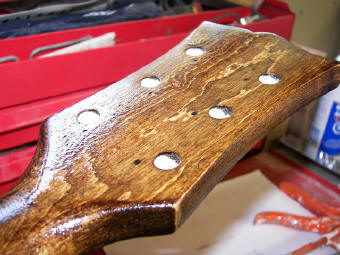
Next I attempted to stain the neck using the same colors as the body,
however I hadn't been as thorough with the stripper on the neck, and it went
all blotchy and was real nasty to behold. I let it dry, then sanded if off,
but it had penetrated the grain and sanding wouldn't remove it all. So I
made lemonade. I re-stained with walnut let it soak in, then wiped off and
stained again with mahogany while it was still wet. The end result is a
pleasing grain with a bit of a spalted maple feel to it.
Note from GutiarAttack: This is why you rub mineral spirits onto the raw wood to see if the
stain will lay down smooth. If it is "splotchy" with mineral spirits,
it will be the same with stain.
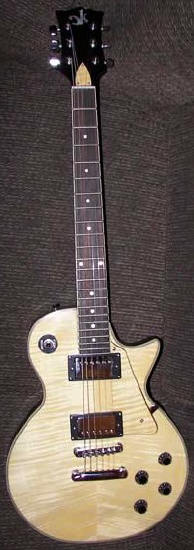
Given that I was going with a blond finish, the black accessories were a bit
stark, so I got some flame Maple veneer and laminated it with some mahogany
to make my own pick guard and truss rod cover.
Sanding and polishing the finish to a rich luster was time consuming, though
uneventful.
Final assembly went without a hitch, everything lined up as it had in the
pre-assembly step. For final setup, I followed the steps outlined on Guitar
Attack, and except for a couple of nail biting minutes as I tuned the string
slots in the nut, I was able to make it playable. The intonation is almost
perfect with the toughest spot to get right being the lower 3 frets.
Now all that's left is to enjoy playing it for the next few decades. (Wink)
Chris Knowles
Mount Hope, Ontario, Canada
 From
Chris: From
Chris:
I finally decided I'd messed up my Saga's
original plastic nut enough that it needed replacement. (I used it to learn
how not to set up the action) At any rate, I couldn't find a listing on the
Graphtech website specifically for the Saga LP, however after taking careful
measurements and cross referencing with their catalog I found part number
PQ-6225-00 to be a perfect fit for the Saga LP neck. I had to sand about 1
mm from the underside near the low "E" and about 1.5 mm under he high "E" to
get the action just right. Now I no longer get that annoying twangy sound
from my open strings.
This particular nut from Graphtech is a slotted nut, and the only
modification I did was to rub the bottom side on 150 grit sand paper until I
had the action where I like it. |
|


