|
|
We at GuitarAttack have a history of not leaving well enough alone. This is the story of how we "fixed" a neck built for one of our alder GS guitars. This neck is one of the early ones with the "six-on-a-side" tuners. Warning: The techniques shown in this article
are potentially dangerous and clearly capable of destroying an otherwise
sound guitar neck. Try these techniques at your own risk, and enjoy! |
 |
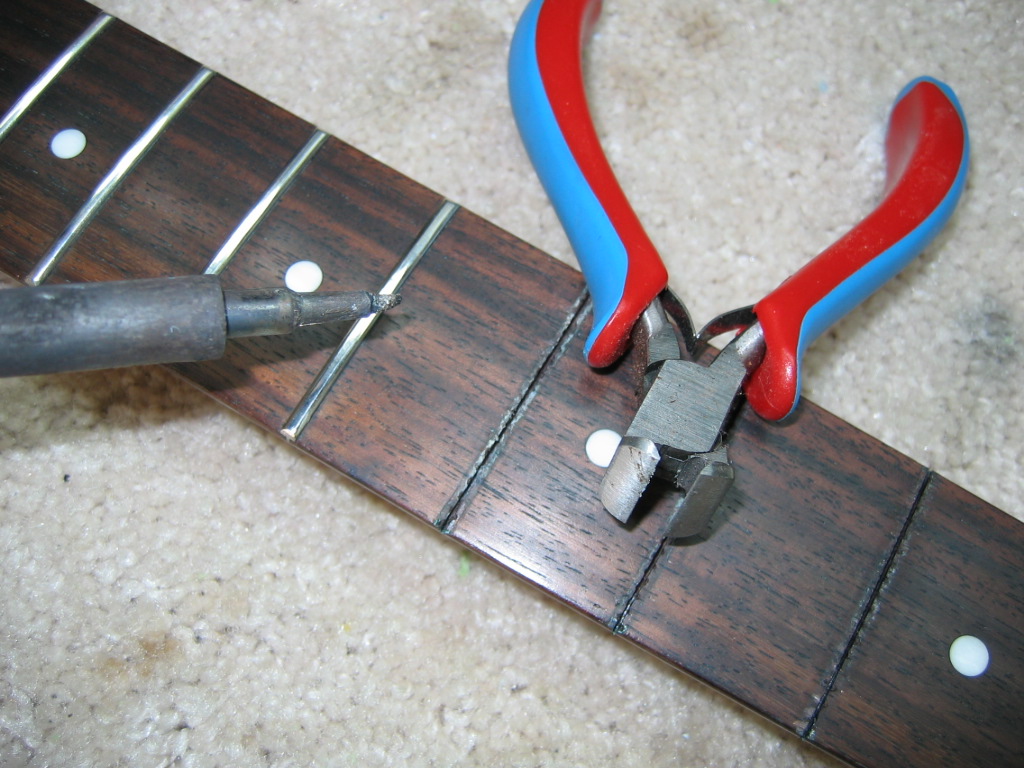
| The first step
was to remove the frets. Using our trusty soldering iron and fret
pulling pliers from StewMac, we removed the frets one by one...carefully. Safety Tip: If your frets were glued in by a "luthier" using superglue, this technique will produce very toxic fumes. We recommend completing this task in a well-ventilated room with a fan capable of moving some air! |
|
|
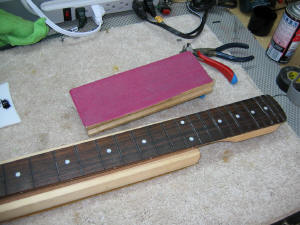
Once the frets were out, we started on changing the radius on the
fingerboard. The fingerboard had a sort of old Fender 9 1/2" radius,
and we wanted to make it a little flatter, and bring it down to 12". First, we adjusted the neck perfectly flat. When you pull frets, the neck's bow will change. If you sand it with the bow, you'll really make things difficult when you try to fret it. Using our trusty StewMac 12" radius sanding block and some 3m Sandblaster 180 paper, we started the process. Safety Tip: This process is irreversible. Do not try this if (a) You have a valuable guitar, (b) You can't stand to screw up your guitar, (c) You are really unsure, or (d) all of the above. |
|
Using the sanding block, we carefully run the block the length of the neck, keeping it straight on the centerline. We use the 180 grit because we don't like the big sanding marks left in the inlays. The majority of the material removal occurs in the center of the neck, so watch those inlays. Don't sand them out! |
|
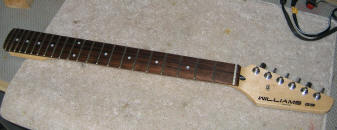
| We made a few passes then checked...made a few passes, then checked... The radius tool kept us on track, and you can see in this photo that we are approaching the desired 12" radius. Normally inlays on most commercial necks are deep enough to take a relatively shallow radius change from 91/2" to 12".
|
|
|
Here is a shot of the neck after re-radiusing prior to cleaning. Note the dust in the fret slots and the line of MOP down the center of the neck. Now we can move on to fretting. |
|
| Go to Page 2 | |
| ATTACK HOME | REPAIR MAIN | ||||||||||||||||||||||||||||||||||||||||||||||||||||
|
|||||||||||||||||||||||||||||||||||||||||||||||||||||