|
Page 2 |
|
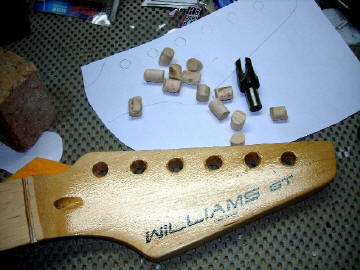
Step 2: Prep the Neck Here is a shot of the Williams GT headstock. While it is kind of cool, putting an odd headstock on a classic T-style body is like putting a really awful spoiler on a classic car -- it just doesn't fit! Lesson Learned: While in storage and being moved around a number of the frets got dings and wound up being damaged. We had to refret this neck. Take care of what you have in storage because you may need it. If you don't need it, sell it and get it out of your shop! We refretted the neck with StewMac 149 wire. It was much nicer than the original wire and we look forward to stringing the guitar up!
|
 |
|
Here is a shot of the headstock with maple plugs cut out with a plug cutter. Be careful here -- the plug cutter can be dangerous. Safety first. |
|
| We put Titebond in the tuner holes and hammered the plugs in to place. Be careful here -- too much pounding on the plugs can lead to a cracked headstock. We learned this from experience....bitter experience. Once the glue was dry we trimmed the plugs with a flush-cut saw. |
|
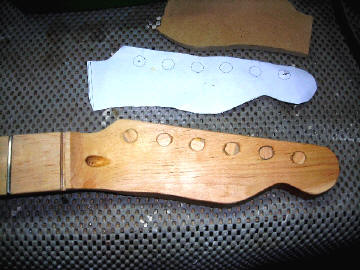
| We cut out a template for the
headstock shape. The neck is face down on the bench and we tried to
fit the headstock outline on the existing headstock. No luck -- we
would have to add some maple. On the bottom left you can see a little triangle-shaped piece of maple glued on to the headstock. This procedure must be done carefully -- the two surfaces must be flat and align as closely as possible so there is no seam between the old headstock and the new addition. We glued the extra piece of maple with Titebond and clamped it over night. Once dry we levelled the back of the headstock on our belt sander. Be careful -- do no over sand. |
|
| Here is a shot of the
headstock after cutting it out with a flush-cut bit on the router table. You can see the little piece of light maple on the lower right corner. We'll have to cover it with the finish. NOTE: Do not buy a vintage guitar from non-reputable dealers. They are too easy to fake and relic. This guitar is for our personal use and is in no way being built to bilk a customer. Buyer beware! |
|
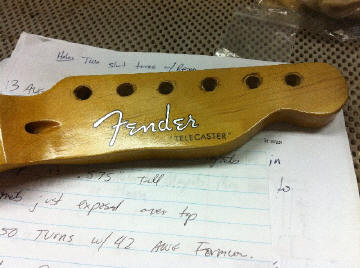
| We drilled out the tuner
holes for the new tuners and started spraying some finish. The initial coats of the StewMac Vintage Amber were really yellow. We mixed up some brown in a lacquer base and sprayed over the yellow to soften it up. We recommend using TransTint dyes from Woodcraft or the liquid dyes from StewMac. We made the brown tint with Tobacco Brown and Amber dye in a diluted lacquer base...about one part lacquer to four parts lacquer thinner. Take your time with this. Don't be afraid to experiment to get the tint right...and don't rush it. Once we got the tint we were looking for we sprayed it on the neck with a PreVal sprayer we picked up at Home Depot. The PreVals are great because you can do a small job without cranking up the compressor, cleaning the gun, spraying, then cleaning the gun again. Check one out when you get the chance. Tip: We put Johnson's Paste Wax on the fretwire to keep the lacquer from sticking it. When the finish was dry we simply scraped the finish off of the fretwire with a thumbnail -- it was that easy. |
|
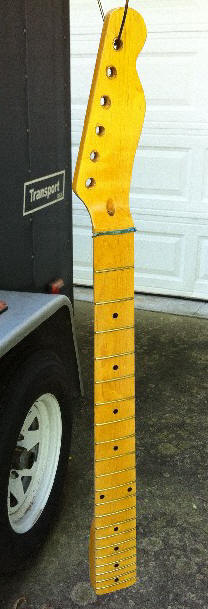
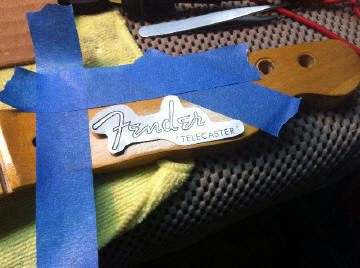
| Once we got the neck finished
we did a light sand and buff -- a relic job, remember? Once it was
kind of shiny we let it set for a couple of days then decided to put the
decal on it. Check this out. Where do you put the decal? We used some masking tape to ensure that the decal was in the right position. This is a logo printed on regular printer paper for reference. |
 |
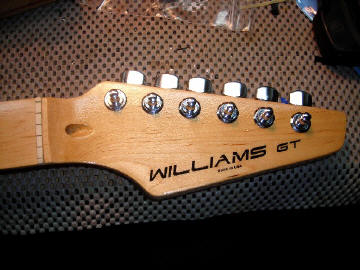
| The refinished headstock is
complete and ready for tuners. Remember -- fakes are way too easy.
Don't get emotional and buy a guitar without airtight documentation and a
reputable dealer. We do not advocate making fakes and passing them off as authentic guitars. This is a personal guitar and we will not sell this as a Fender. Don't even ask! We installed the Gotoh locking tuners and a vintage-looking round string retainer. Let's move on to the body. |
 |
On to Page 3 Back to Page 1 |
|
| ATTACK HOME | "BUILDER'S GALLERY" | ||||||||||||||||||||||||||||||||||||||||||||||||||||
|
|||||||||||||||||||||||||||||||||||||||||||||||||||||