 |
| From Dave Slusser,
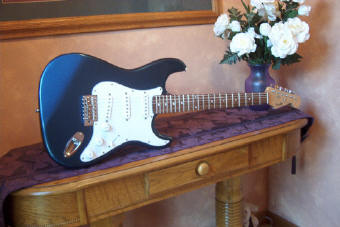
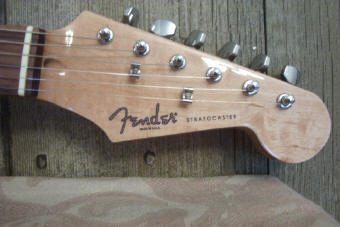
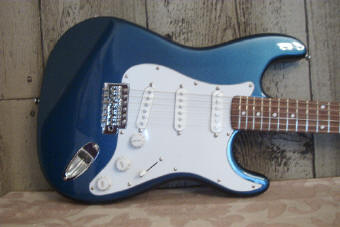
Summerhill Studios, Pennsylvania USA: Details: Stock Saga ST-10 kit start to finish. No upgrades, or changes. The finish is Automotive Polyurethane. The color is 1978 Corvette Dark Blue Poly Metallic as per my customer, with
an extra 1/2 teaspoon of Aluminum Sparkle added to 3 1/2 oz. of base coat
cut with 4 oz. of reducer for a total of 8 oz. of base coat.
There's 4 heavy coats of base coat over 4 coats of sandable automotive
medium tone primer.
There's 8 coats of Automotive clear coat over the base coat. The finishing started with the usual stripping of ALL sand and sealer from the body and neck then masking off the fingerboard. Next, two light coats of Zinsser Seal Coat were applied, sanding between coats after fully cured, with 320 grit paper to a decently smooth finish. Take your time on this step -- this is the basis you're going to build your finish on. I can't over-stress the importance of proper wood prep. Without it, NO finish will be satisfactory. Steam raise any compressed wood and fill any gouges or deep scratches with a suitable filler. I prefer Famowood filler for it's ease of tinting and sandability, but that's personal preference. Use whatever works best for you. Next I shot the primer, allowed it to flash off for 24 hours, then wet sanded to 1000 grit. Then I wiped the whole body down with automotive body cleaner ( NOT reducer ) -- reducer may soften and ruin the primer. Use regular cleaner made just for that. Let it flash off for about 20 minutes, and proceed to shoot the base coat. One light, slightly dry tack coat, let it flash off for 5 minutes then start shooting the rest of the base coats. Once you're satisfied that you have done the best you can, wait for the base coat to flash off. As soon as you can touch the paint without pulling " strings " of paint off, shoot the clear coat. A word of caution: I know that automotive paint says there's a " window " of time, usually 24 hours that you can wait between the base coat and the clear. Trust me on this -- the faster you get the clear coat over the base coat, the more chances you'll have of getting a great finish that will last. There are issues that WILL arise if you wait too long, and you will run the risk of the finish peeling or flaking. The neck was done with 8 coats of straight high gloss lacquer. I wet sand to 1500 grit after the 2nd, 4th., and 6th. coats. After the 8th coat I wet sand with 3M Micro Mesh 2400, 3200, 3600, 4000, 6000, 8000, and 12,000 grit. After that I use Norton's Liquid Ice buffing compound and power buff. I use the same process on the body -- 1500 thru 12,000 then Liquid Ice and power buff. After that, it's just reassemble the guitar, fine tune everything, string 'er up and go nutz !!!! I realize that automotive polyurethanes are NOT the weapon of choice for the Guitar Building Purist, but due to economics, the customer's request, and just plain availability, this was the only feasible solution. I couldn't clone the color and Metallic look he wanted quickly and easily without going this route. All in all I had no surprises with this kit. Everything went together as it
was supposed to, everything fit, and surprisingly, all the holes lined up !
I currently have five more in the works. Happy building folks. |
|
 |
|
 |
|
 |
|
As always, great job, Dave -- Keep up the great work! |
|