|
| Note from
GuitarAttack: This is a great Saga Saga. Lots of great
techniques and effort. Thanks! From Jason Robinson
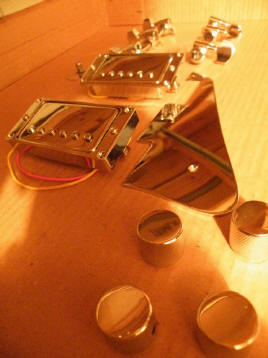
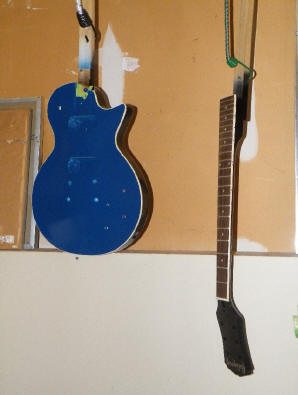
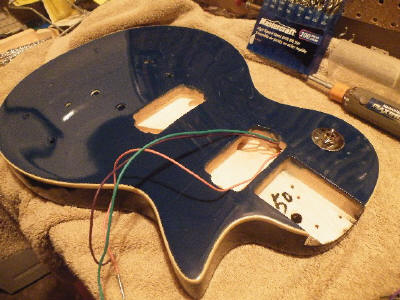
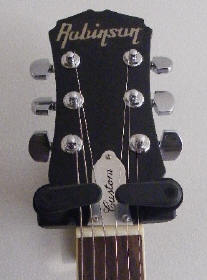
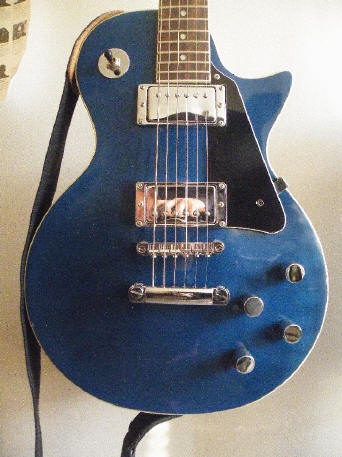
I wasn't intent on using many of the plastic parts that came with the kit, so I ordered some chrome parts from various suppliers. These parts include mounting rings, locking tuners (highly recommended!!), a custom made truss rod cover, volume/control knobs, selector switch washer and a square jack plate. I also got a chrome selector switch knob and a chrome pickguard (which took 6 months to get!!) and didn't end up using them. The original plastic parts accented the black paint a little better. For paint, I used DupliColor auto paints and high gloss lacquer. I used about 2 coats of primer, 5 coats of color and 25 coats of clear, sanding lightly every couple of coats. Do not rush the painting, it will only cause more work in the long run, but you will get a feel for how heavy each coat can be. Taping off the binding was a little time consuming, but well worth the effort. After the color on the neck was done, I applied the logo (after a very light coat of lacquer in order to adhere it) and proceeded to begin the many coats of lacquer. I built up enough coats to allow some sanding on the logo and try to minimize the transition at the edge of the transparency paper. After several months of clear coating, I wet sanded using 400, 600, 1000, 1500 and and #0000 mesh pad, tack clothed it and used ColorTone polish (medium, fine and swirl remover - HIGHLY RECOMMENDED FOR A GLOSSY CANDY SHELL FINISH!!!) from stewmac.com. Over the last couple of days, I put it all together very carefully (think before you drill, don't rush or you can ruin several months of hard work!) and set up the action, intonation, etc.. and it plays like a dream! Sounds much better than my Tele/Bigsby combo, though maybe I'm a little biased as this is a product of my labor. I also chose to rearrange the potentiometers a little (it's custom, why not make it how you want to?) so I set the selector switch the go left/right instead of up/down (flick it forward for the neck pickup, back for the bridge pickup - makes sense, right? - only possible because I bought a selector switch washer without the rhythm/treble print on it). In keeping with this idea, I arranged the two knobs closer to the neck to operate the volume/tone of the neck pickup and the two rear knobs to operate the volume/tone for the bridge pickup instead of the classic Gibson layout. All in all, I was very happy with the kit (not including the plastic accessories, which I never intended on using anyways). The pickups are pretty reasonable and sound nice and chunky. The only (very minor, albeit) beef is that I can't seem to get the intonation quite perfect. I think the pre-drilled holes for the bridge bushings could have been about 5mm further towards the butt end of the guitar, but maybe my lack of expertise has caused me to neglect an alternative way of adjusting it just right.
I would recommend the Saga kits to anyone. You get out of it what you put
into it. My next project will be a bass kit from grizzly.com. Check it out,
they look like pretty decent kits.
|
|
 |
|
 |
|
 |
|
Great job, Jason -- Killer hardware! |
|
| ATTACK HOME | "SAGA SAGAS" MAIN | ||||||||||||||||||||||||||||||||||||||||||||||||||||
|
|||||||||||||||||||||||||||||||||||||||||||||||||||||