|
| Note from
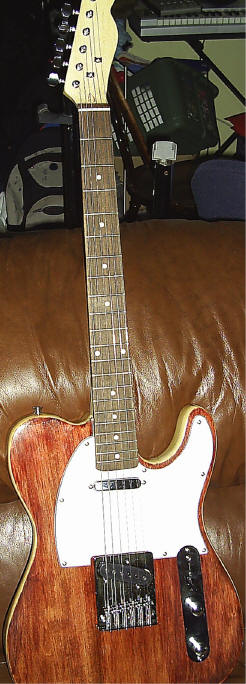
GuitarAttack: While some may be inspired by an "over the top"
build, this shows what is possible with a bare kit and some stuff from that
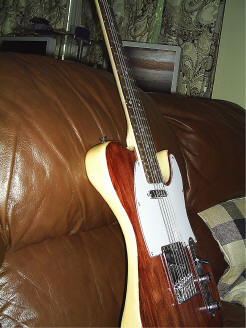
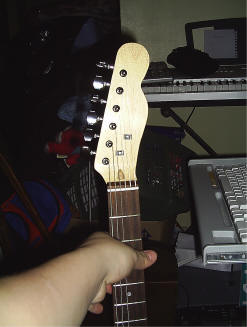
big home improvement store down the street. Read on... From Marco Conetta Here's a story. So when I got it I immediately got to shaping the headstock. At the time, I didn't have a coping saw so I was stuck using a file which to a scarily long amount of time to do and was rather tiring. My dad got mad at me and said the file would leave marks in the wood. I sanded what I had so far and it seemed fine but he insisted that I buy a coping saw, so I did. I brought the saw home, tried it, and it just tore up the wood! I left it with two or three very small dark lines in the wood -- not what I would have wanted -- but if I sanded or filed it anymore I would just go outside of my headstock design. I finally finished in in a few days. I then polyurethaned the sides but eventually decided to just re-Poly the whole neck even though it was sealed. I liked the feel of the Poly better because it was more slippery. Once that was done I wanted to get to finishing the body. I'm a rather impatient person so I didn't want to spend like a month stripping the ridiculous sealer off the body, so I decided to do an automotive spray finish. I did my T-Style like a '56 goldtop Les Paul but I wasn't happy with the finish. I just couldn't get it very even so I then went directly over it with a silvery spray. Ultimately I didn't like that and was very discouraged and was just about ready to give up. I got home from school the next day and my mom had started to strip it for me (Note: How is that for a supportive parent?...Ed..) which got me back into it. I decided I would just strip and sand the top of it and do a dark mahogany stain and leave the rest of it as the natural color. I "polyurethaned" the whole thing so it was a two-tone. Online everyone said it would take a few hours to put together but I managed to do it on my lunch break with no problem. I brought it downstairs and plugged it in, but when I switched to what I thought was the bridge pickup it lost all sound. I opened it up and realized I had put the control plate on backwards and in the process of putting it on had broken the neck pickup connection. I decided that I would re-solder it, though I'd never used a soldering iron before. When I got it back together I found that it worked perfectly. However, the bottom few strings seemed to be completely muted on all of the frets. I had no idea why the part of the neck inside the body was so high. After some thought, it appears you have to screw the part of the neck closest to the body in first then the other two or it doesn't go in flat. I loved doing this project. It was fun and the guitar honestly sounds better than my other guitar, meaning I can sell my other guitar now. If you have any questions about the build, email me at tenjou_ahs@hotmail.com
I am sure that in the near future I will be buying more of these kits, they
are solid and a great way to pass the time, thanks for reading :) Marco Conetta |
|
 |
|
 |
|
Great job, Marco -- Keep on building and send us more photos! |
|
| ATTACK HOME | "SAGA SAGAS" MAIN | ||||||||||||||||||||||||||||||||||||||||||||||||||||
|
|||||||||||||||||||||||||||||||||||||||||||||||||||||