 |
| Note from
GuitarAttack: The ingenuity we see on these guitars continues to
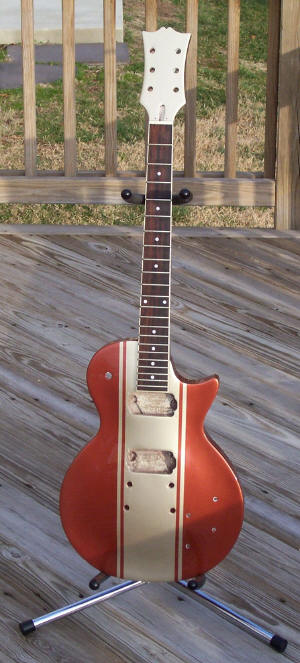
amaze us. Check out this "Camaro Z-28 Tribute" LP-Style. The
attention to detail is awesome. From Mad Man Mike
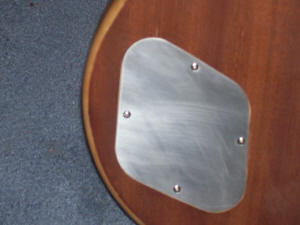
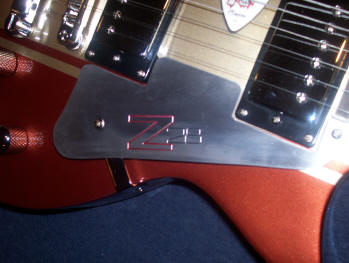
Originally I had planned to do the guitar up flat black with diamond plate accessories. But one day I was thinking,Ē Hey why not do it up like my dad's carĒ. So Christmas rolled around and by the end of Christmas day the kit was put together. The biggest problem was that the electrical schematic didnít match up with the wire colors. That meant that my dad and I had to source everything out witch was a pain in the butt. So after two weeks of breaking it there was only one problem: The neck pickup wasnít working. We took it to our neighbor Mr. Mike to take it to work and see if Mr. Fink could fix it. What he did was ground all the pots together and, sure enough, that fixed it and it sounded better. Before we took it apart we carved the headstock. The only mistake we made was not removing the tuners because the top two got scratched up. Also before we took it apart we had a machinist friend of ours make all the plastic parts out of billet aluminum. I played it for about a one more weekend then took her apart. My dad had started a job near the shop that painted our car. So one day when I went to work with him I took the guitar with me and dropped it off when we were finished. Because we used actual car paint we went ahead and attached the neck and had it painted as one piece. After about two weeks I went back to work again and saw it before it had clear coat. Even flat the guitar looked amazing. So when I went back to work I saw it again with clear on it, it really looked AWESOME!!! I got it back after about three weeks (which is fast figuring that they had to order paint). Now thereís a reason they call that color sun lit copper. If you take that thing out into the sunlight it lights up. I forgot to mention that while the guitar was being painted I went to Hot Licks and got some chrome knobs instead of the plastic ones.
The weekend after we got it painted we put it back together. Once we had all
the shiny stuff back in it looked beyond cool. Although it wasnít a cheap
build, Iím very happy with the way it turned out. Thank you Mox, Mr. Mike,
Mr. Fink, HRE, and Dad for all your help. I hope to send in more pictures of
the guitar with the car and when we polish the pick guard. PS. My dad has a 1973 Camaro. We're going to show the guitar for the first time at the Spring Ocean City Show and hopefully I'll be able to send you pictures from that. We also ordered a guitar cable that looks like spark plugs on the ends. |
|
 |
|
 |
|
 |
|
|
|
|
Polishing the Plates! |
|
| Warning the
following requires extreme patience!!!! Today Iím going to teach you guys how to polish billet aluminum to a chrome like shine. The first step is to get yourself a dish of warm water with soap. This process is called wet sanding. The best way to start is with about a 500 grit paper to remove any deep scratches and grains. For the best results keep the paper wet and DONíT cross grain the metal. Trust me those are hard to get out especially hard to get out when on a higher grit. Sand the piece till there are no deep scratches and has a dull shine. Now for the pieces on the back of my guitar we only went up to 1500grit and they still have a good shine. After sanding with the 500, itís time to step it up to 1000 grit. Now the higher the grit the harder it will be to reverse cross grain and other mistakes. Follow the same steps until there is a pretty good shine. Now the more time and patience you put into the first stages of sanding the better the result will be. After the 1000 grit take it up to 1500 then 2000 for
the best results. After sanding with the 2000 youíll really start seeing
results, but the wet sanding is only half the process. After you wet sand up
to 2000 its time to bust the billet polish. I recommend using Hot Rims Mag
Polish. First apply the polish using an inside out sock (trust me it works).
Now with this polish it does not take a lot especially on a small surface.
Any way rub the polish in till the sock starts to turn black. Then take a
micro fiber rag and remove the polish. For the best results I suggest doing
this at least 3 times for a chrome like shine. Now to keep it shining bright
polish about every other week. Well thatís all for now be sure to keep up on
it and keep it clean. |
|
|
|
|
|
|
|
| Great job, Mike! | |