| Note from
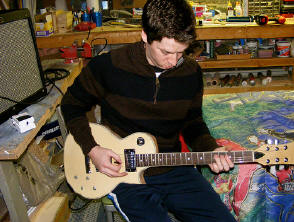
GuitarAttack: From our friend Andy comes this killer LP-style
build with an awesome sunburst!
From
Andy Crowder
I'd just like to thank you guys for keeping the site up and running and
updating it continually with more Saga Saga's. Last year around this time I
sent a story about my own Saga (Silver S-style) and I've got another one to
send your way. Here's the story:
The Crowder Saga Saga - Part 2
It's been a long year since I made my ST-10 and I still love it and gig it
regularly (just did a few days ago!). I was completely surprised this year
to receive an LC-10 for Christmas, and wasted no time in attacking it head
on.
This time, I took the suggestions of a few others and decided to construct
the guitar right out of the box before finishing it. This was a good idea
for a number of reasons. First off, it lets you know if something doesn't
work properly or if there are any missing parts. If there are problems, if
allows you to fix them without having to worry about ruining the finish.
Second, it lets you play the guitar a lot sooner! I put it together without
a hitch (thankfully) and was playing it within an hour or two. Upon the
initial build, the only things I really saw as "must-fixes" were the tuners
and adjusting the nut. Other than that, the pots/wiring and pickups worked
pretty well. I was very happy to find a nice tight neck pocket too, it
really just adds a bit of confidence while playing to know that it's not
going to fall apart on you.
After I had played it for a few days, maybe a week, it was time to take it
apart. One thing I made sure to do was to tape the various screws to the
pieces they went with. So each pickup had it's four screws and everything else
was matched up to remove any confusion when it was time to build again. The
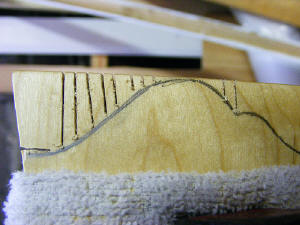
next step for me was to shape the headstock. As functional as the
utilitarian paddle-headstock was, it lacked a certain flair. I decided to
base this headstock off of the Epiphone Masterbilt line. It's a very sharp
looking, asymmetrical shape that I can't get enough of. I don't have many
high tech tools to make this easy, so I used a hacksaw, and took out small
bits at a time until it was down to where I could sand it smooth. It was a
bit labor intensive, but in the end, it turned out well.
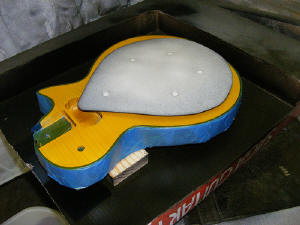
The next step was deciding on a finish. I have always loved sunbursts, so I
thought I'd try my hand at it. I searched the web and found that Stew-Mac
has aerosols specifically designed for creating sunbursts. I decided to try
these out and ordered the amber lacquer, and also the black. I figured with
a little patience and caution, that I could made the burst with just the two
colors.........but I was wrong. I first tried the burst on the back of the
guitar, and it turned out really, really bad. At that point, I swallowed my
pride, pulled out my wallet and ordered the tobacco brown to use as the
transition area for the sunburst. I ended up sanding down the first attempt
and gave it a second try. I did use the "poor-boys sunburst" method which
utilizes a posterboard cutout in the burst shape. This worked very, very
well. After I laid down enough of the amber color, I set down the template
and started with the brown. I did one good pass with the template on to give
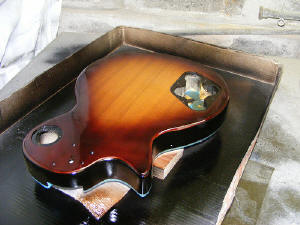
myself a guide and then proceeded to fill it in free-hand. The same process
was done to the front with no problems (the pictures will give better detail
to the process). After that I did a burst pattern on the neck as well, for a
couple reasons. I didn't want a plain black neck, and thought that it
would be a cool way to tie everything together, not to mention cover up the
scarf joint.
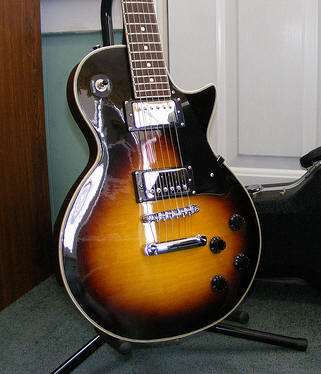
After that, it was all about clear coat. I used Deft gloss aerosol, and
proceeded to lay several cans onto the guitar. After a while, I gave it the
fingernail test, to see how hard the finish was and it passed. I decided to
wetsand this time with the Micro-Mesh pads. I'm very happy with these. I was
impatient and skipped a few of the pads, but all in all they worked very
well and were surprisingly inexpensive. After the Micro-Mesh, I buffed and
polished the guitar and neck to a nice gloss. After I put it all back
together, I straightened out the neck (it was pretty bowed) and found that I
filed the nut too low! I've purchased a GraphTech Tusq nut, the same that
Chris Knowles suggested, and expect it within the week. I also purchased a
set of open-back Grover tuners and converter bushings. Very nice tuners.
All in all I'm very happy with this guitar. Even with the bad nut, I can
still play up the neck a ways and get a really nice growl out of this
guitar. The sunburst turned out well, and I'm really excited to get it up
and running properly. Hope you guys enjoy it as much as I do!
Click here to see all the pictures that I took of this build.
Also, click here to see some videos of the guitar in action on YouTube:
http://www.youtube.com/watch?v=OuI-RHIz7w8
http://www.youtube.com/watch?v=wnbLK7ru3dY
Thanks!
Andy Crowder
|
 |