| Note from
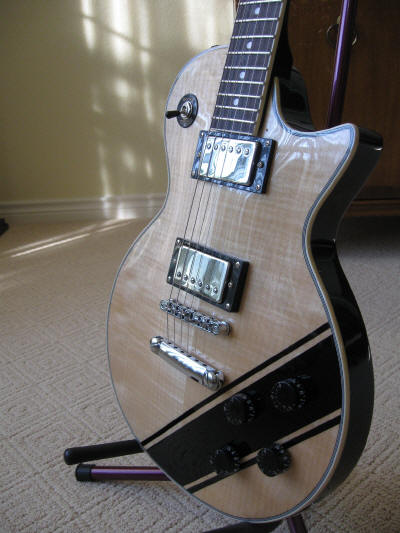
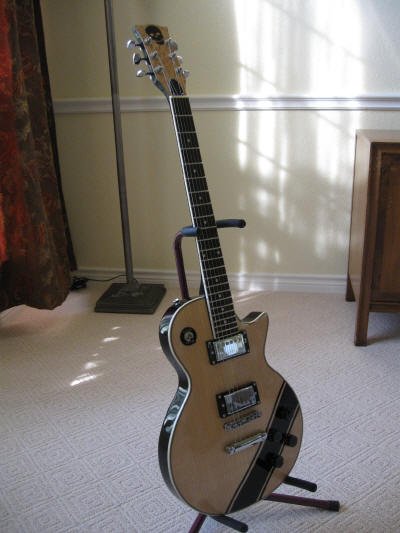
GuitarAttack: From the Great State of Texas comes this killa LP-style.
There are some great lessons in this story...read on.
From
Daniel Smith
Hi John,
I finally finished my Saga LP build.
I’d be thrilled to see some of my pictures posted on the web site.
The Guitar Attack website inspired me to build a Saga LP kit.
Thanks for introducing me to a really fun hobby!
I’d like to share some of my experiences building the kit.
First, put the kit together, play with it for a few days, and make any
necessary adjustments before applying the finish! (Note: This
is critical...Ed.)
The neck and nut:
I found the second fret to be about 0.03” taller than the other frets and
the guitar was unplayable.
I used a straight-edged metal ruler and adjusted the truss rod until the
fret board was flat. I leveled the frets using a piece of aluminum angle
with 220 grit sandpaper tightly wrapped and taped to the aluminum. I slowly
moved the leveler across and back and forth over the frets. I marked the
tops of the frets with a sharpie pen so I could see which frets were low and
repeated this until all frets were level. I then filed the frets to obtain
rounded crowns.
I polished the frets with 600 grit paper.
The nut slots were way to tall. I adjusted the nut and ended up with pretty
decent action. The nut was the most difficult part of the build. Luckily,
there’s plenty of advice on the internet.
Wiring:
The guitar hummed terribly using the supplied wiring. I replaced the three
wires going to the pickup switch with shielded cables and soldered the
shields to the back of one of the pots. No hum whatsoever now. I got rid of
all of the wire connectors and soldered the wires directly. By the way, the
pickups sound pretty good!
Finishing:
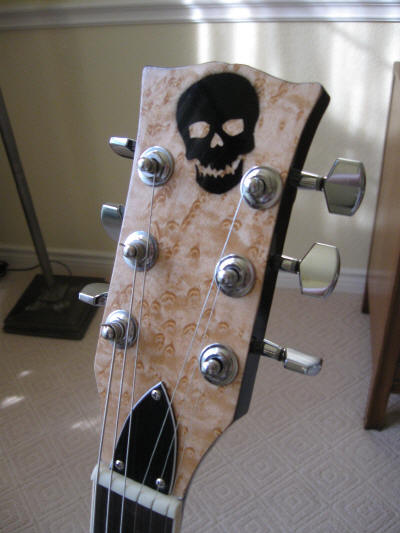
I cut the headstock to look like a LP. I glued a maple veneer to the
headstock only to have it peel off a week later.
Titebond glue does not adhere to the sealer! I sanded the sealer off of the
headstock and applied a new veneer.
I bit the bullet and hand-sanded the sealer off of the front of the guitar
body. It took about six hours.
Note that the veneer is thin and can easily be sanded through, so be
careful.
I decided to go with clear on the face and black everywhere else. My first
Guitar was a ‘60s Fender Mustang that was yellow with orange racing stripes,
so I decided to paint the black racing stripes. I used Deft gloss lacquer in
spray cans for the clear. I had to order a can of Behlen's black lacquer
after I found out that the Minwax lacquer I had is not compatible with the
Deft. After spraying the black, I let it dry for a few days.
Special note: if you apply blue painter’s tape to a lacquered surface, it
will turn the surface into a gooey sticky mess, so tape, spray, and get that
tape off quickly!
I sprayed about three cans of clear on the body and neck over the course of
several weeks.
I found the lacquer had to dry for one month before it was hard enough to
wet-sand.
I wet-sanded the body and neck using 600 and 1000 grit paper. Bad mistake:
water seeped into various holes, lifting the veneer and creating a few
cracks here and there. After the final sanding, I let the guitar sit for
several weeks for more drying. The I polished it with Maguire’s swirl
remover.
Building the Saga LP kit was very rewarding. The guitar plays well and
sounds good. The “maple” neck is pretty limber and a bit disappointing, but
the guitar does stay in tune. I learned a lot about adjusting frets and nut,
and setting the proper neck angle. Since this build, I have built a Tele
kit. I added maple and walnut (I dug out of my Grandfather’s barn 30 years
ago) to the face. This build went quickly. My next build will be a Gibson
Explorer completely from scratch.
Thanks again for hosting the Saga web page!
Best Regards,
Daniel Smith
Round Rock, TX
|
 |


