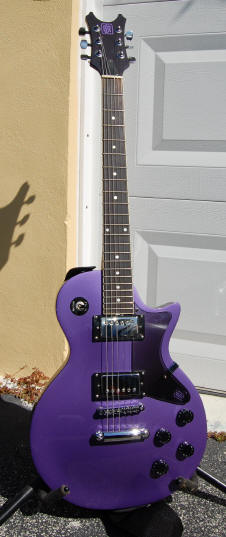
| Note from
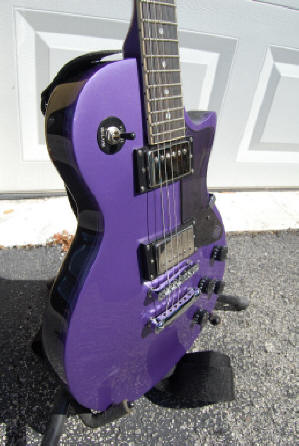
GuitarAttack: Wow -- what a killer paint job and wonderful
attention to detail. Check out the "binding" and logos on the
pickguard and headstock....Great work!
From Chris
Perz
A SAGA LP Style
Guitar Attack,
This was my first attempt at building a guitar. It was a learning experience
and a lot of fun. I wanted to have something very unique and at the same
time a very playable guitar.
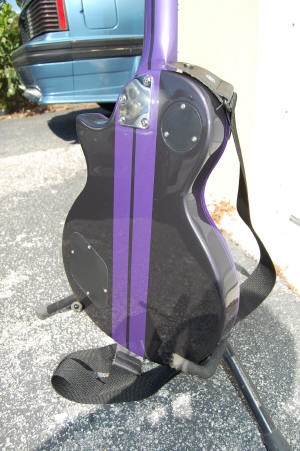
First things first, I wanted it to have the look of an old
muscle car, something like a 1970
Dodge Challenger. Conveniently, I happened to have a quart of "Plum
Crazy" that I bought a long time ago for use on a plastic model kit that I
never got around to building. At first I thought I would try a sunburst, but
I felt that the whole sunburst
color scheme has been way overplayed. So I decided to go with a two
tone of Plum Crazy and Black Metallic.
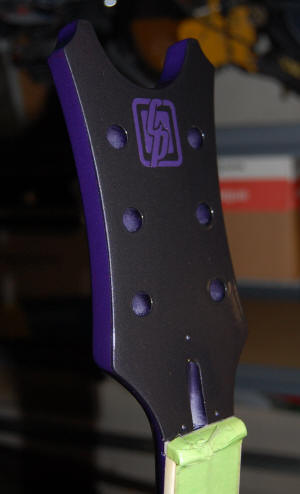
The next step was to decide on how I wanted to carve the headstock. I was
looking at some of my other guitars and really liked the shape of my Dean
acoustic guitars headstock. I decided to use that shape and go to the
extreme with the cut.
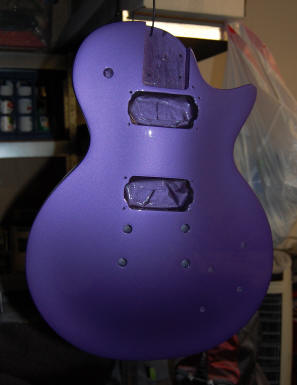
After the headstock was carved and the body all ready to go, I proceeded to
get everything primed. I used a urethane based primer that is used on cars.
This stuff sticks great and does not have shrinkage problems that are
associated with lacquer based primers. After the first prime was cured, I
proceeded to block that down with a 400 grit sandpaper so that the majority
of the flaws would disappear. Then, everything was primed again, left to
cure, and blocked down again with 600 grit and then over that with 1000 grit
to get it as smooth as a baby's bottom.
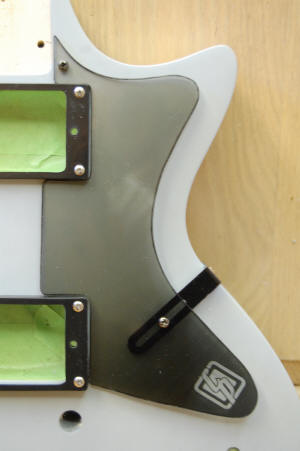
Next came the pick-guard. I really was never too impressed with the plain
old
Les Paul pick-guard. I decided to use a piece of clear lexan I had
laying around to make a new one. Question was, what should I do? I decided
make the pick-guard a gradient from black to clear with a custom made logo.
That was done by using some ink-jet water-slide decal paper I had purchased
years ago.
Finally, it was time for paint. First, I sprayed the "Plum Crazy" color.
Then I masked off the stripes, including the logo for the headstock, which
was cut out using a digital plotter on removable vinyl material. I then
proceeded to spray the black metallic. After that set up, I removed the tape
and proceeded to clear coat. I used a urethane based clear coat, spraying
about four good coats over everything.
After about 2 weeks, I wet sanded everything with 2000 grit sandpaper,
polished everything out, and proceeded to assemble the guitar. everything
went together great. I also decided to use a set of
Seymour Duncan pups I had lying around. They sounded great in the
last guitar I had, so I figured, why not?
After everything was together and ready to go, it was time to plug her in.
Holy cow! What a great guitar.
Nothing makes you feel better than working on something and having it exceed
your expectations.
Now that I have completed this project, I am tempted to get another one and
see what I can do with it.
Chris Perz
Boca Raton, Florida
|
 |