 |
|
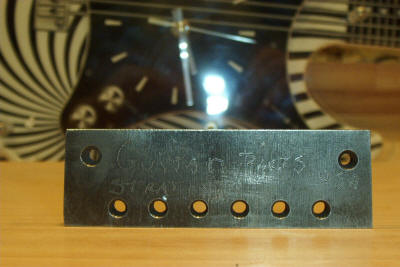
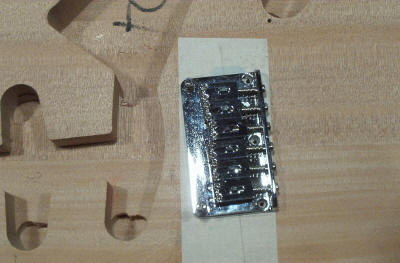
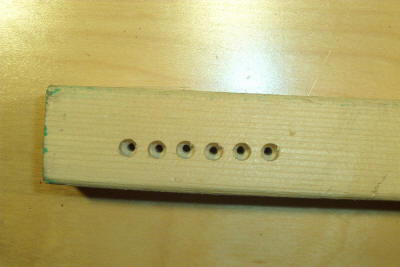
How do you drill ferrule holes through that body? Our friend Dave Slusser figured out a technique, and he was kind enough to share it with us. Maybe you can get Dave to make one for you! Read on! This jig is for a Strat hardtail bridge. The two holes at the corners match the two front corner holes in the bridge. I didn't feel it was necessary to drill all six holes since the front two will hold the jig securely as I drill the string thru holes. Once I locate the bridge and drill the front two corner holes, I remove the bridge and replace it with the jig, using the front two corner holes to hold the jig in the exact same location as the bridge. Now I can drill the string thru holes, replace the bridge and drill the three rear holes. The bridge corner holes are 1/8" the string thru holes are 9/64". This is made of 3/8" thick oil hardening Sheffield flat ground stock. Since it's hardened, the drill will never wear it out. I didn't see any reason to polish it and make it look pretty, just functional. I use D2 oil hardening steel and harden to about a Rockwell 60. This makes it impervious to drill wear, however it will shatter if you're not careful and get it too hard when you temper. I go to about 1000 degrees for 15 minutes and oil quench. IN ACTION: The next photo shows the bridge on the guitar and the holes marked for mounting. The tape being crooked makes the whole thing look out of alignment, but it's not. I use masking tape to write on for my lay out because it's easier to use Naphtha to remove the tape residue than to try to get Graphite out of the wood grain if you use a pencil directly on the body. Hard as you may try, Nitro WILL NOT stick to Graphite !
Dave Slusser
|
 |
|
 |
||
|
|
||
 |
||
| Note: Like Dave, we prefer to drill ferrule holes with a drill press, but you can use a rig like this to make sure the holes are "square". Click here to get it at Woodcraft.com, or for a more deluxe version, click here. |
|
|
| As always, thanks Dave! | ||