|
We normally can't leave well enough alone when it comes to guitars. Several months ago we
purchased a Mighty Mite/Wilkinson trem system for one of our GS development
guitars. Due to travel and general procrastination, the trem sat on the
shelf, biding its time until the big day arrived. This is the story of
that day. Safety Note: If you try
this procedure, make sure you understand that it is irreversible, and it is
very easy to destroy a good guitar. Make sure you take your time and
keep safety front and center. If you have any doubts about your
ability, or you are afraid of rendering your guitar unplayable, please see a
qualified luthier or repairer. |
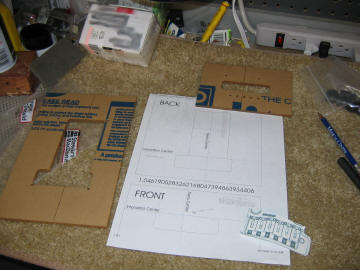
| Laying it Out!
Like any bridge installation, measure about fifty times
and cut once!
All kidding aside, the key to installing a bridge like
this is making sure your measurements are perfect.
Here are some acrylic trem templates available from Stew-Mac,
and a Wilkinson trem template found on the internet printed on some regular printer paper.
The template on the paper has the guitar center line and intonation center
printed.
Safety Tip: These templates did not match
exactly. Do not trust the templates from anyone without verifying them
first. If we had've used only the Stew-Mac templates, the Wilkinson
trem would not have fit properly. |
 |
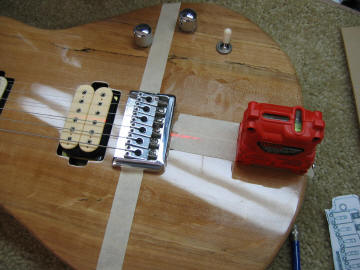
Measuring is always
tough. That is why we are using a "laser". This is a pretty
inexpensive Black and Decker laser measuring device that is much easier to
use than a straight edge when working on a guitar. It lays down a
perfectly straight line and goes over parts and pickups with ease.
We put some drafting tape on the top of the guitar to
make sure the measurements could be clearly marked without marring the top.
Next, we marked the center of the nut with a pencil for alignment. DO
NOT USE A SHARPIE!
To get center, we lined the laser up with the mark on the
nut and made sure it hit the bridge exactly between the third and fourth
saddles on the bridge. We checked it a number of times and marked the
center on the tape with a pencil. Do not use a Sharpie here -- it will
bleed through the tape.
Finally, we marked the "intonation center" of the bridge.
This is where the strings break across the saddles. Because the guitar
played great already we would use the saddle position to locate our new
bridge.
Safety Tip: Do not stare into the laser. |
 |
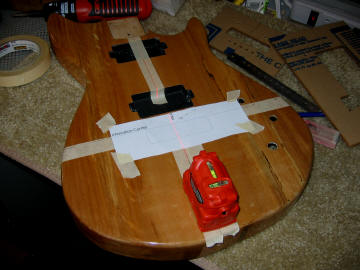
Once center and the
intonation center were marked, we removed the strings, bridge, neck, and
electronics. What we had was a stripped body and a box full of parts.
Once the body was empty we lined-up the paper template
with the lines we had drawn on the tape. Again, using our laser, we
aligned center and made sure the intonation center was correct.
Once the template was in place, we used a scriber to
scrape the outline of the bridge into the top. We also used the
template to locate the centers of the two posts on which the bridge pivots.
Safety Tip: Take your time here. If
you don't get the bridge properly aligned you'll never have a playable
guitar! |
|
| Time to Drill
When we were satisfied with the alignment we installed
the top acrylic template with two pickup ring screws. Using a Freud
3/4" Forstner bit in the drill press we hogged out most of the wood in the
top cavity. This cavity is 1 1/8" deep, and the Forstner bit worked
great.
Following the directions in the Stew-Mac kit, we drilled
two 1/2" holes all the way through the body. These are critical for
alignment of the back templates. Note: You must use a
drill press for this operation.
We cleaned up the top cavity with a pattern following
router bit in our router. Routers can be really scary, and you have to take
your time.
Safety Tips: (1) Always wear safety goggles when
working with power tools; (2) Always wait until the router stops completely
before you pull it off the work piece; and (3) Keep your hands away from the
router bit!
|
|
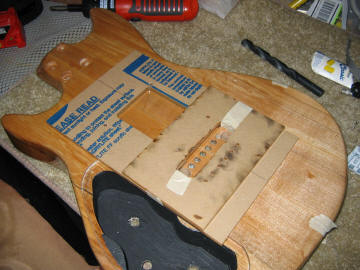
| Once the work on the front was complete,
we had to move on to the back. Here is a shot of the big template (for
the spring cavity) with the smaller front template taped to it. Using
the two 1/2" holes we were able to align the back template. We marked
the position inside the big template with a Sharpie because we were going to
remove the wood anyway. Once marked, we taped
the big template down with some double-sided carpet tape and made sure it wouldn't move
before we started removing wood.
Safety Tip: Only use a Sharpie on wood
you don't want to keep.
|
|
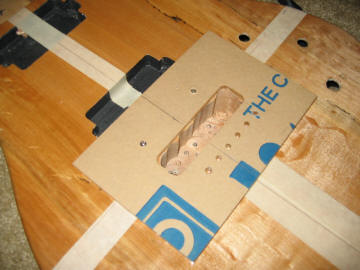
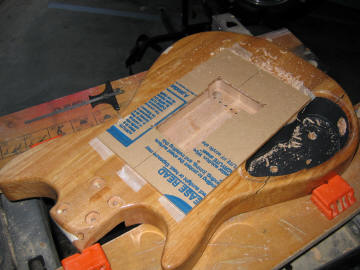
| We started out hogging the
wood using our same Forstner bit on the drill press. The back cavity
has to be 5/8" deep, so we went to about 1/2" with the Forstner and saved
the other 1/8" for the router so the cavity's bottom would be smooth.
The Forstner bit will leave little dents in the wood.
Here is a shot of the finished rear cavity. We had
to go deeper than 5/8" in the trem block end of the cavity to enable dive
bombing on the trem. We wound up going about 1 1/8" deep in that
route. The final route resembled a vintage Strat route.
After routing we pried the template off of the guitar
and flipped it over.
Safety Tip: If you feel the template move
in the least while routing you must stop immediately and reattach it. |
|
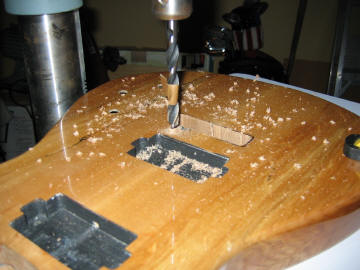
| Drill the Holes for
the Two Posts
When the front and rear cavities were complete it was
time to finish it up. The only thing left was the two holes for the
bridge posts.
The posts require a 10mm hole. Note the "tape
flag" on the drill bit. We used this to show the depth of the hole.
The tape corresponds to the depth of the post. When the flag hits the
top of the guitar it is deep enough. We blew out the holes with
compressed air and inserted the studs into the holes.
Once this was complete, we reattached the neck.
We slid the bridge into place and held it in place with some masking tape to
keep it from popping out when we flipped the guitar over.
Safety Tip. Measure about fifty times and
drill once. The positioning of these holes have to be very precise and must be
perpendicular to the top. |
 |
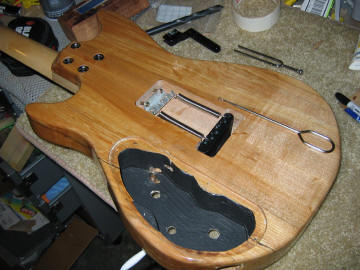
| Fingers
Crossed!
We positioned the trem claw and used a 1/16" bit to
start the two holes for the attachment screws. Make sure you drill
these at a downward angle.
We initially installed two springs. I believe
the length of the trem cavity might be too long for the Wilkinson, but it
will still work. Note: the Mighty Mite bridge did not come with
instructions!
Note the little tool for the springs just above the
trem cavity. It looks like a fishhook removal tool. This will
make your trem life much simpler. Get two from Stew-Mac and keep one
in your traveling kit.
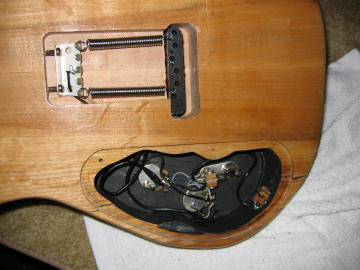
Finally, don't forget the ground wire. We used a
long drill bit to drill a hole from the bottom side of the spring cavity to
the control cavity. We'll solder the wire onto the trem claw when we
get the guitar back together.
Safety Tip: If you ever scratch your guitar it
will probably be during the installation of trem springs.
|
|
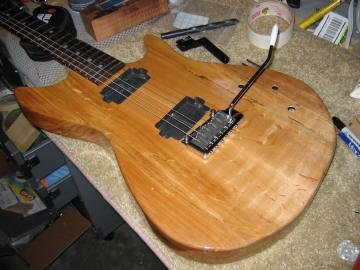
| We put the two E strings on
the guitar first and were very pleased to find that the bridge lined up
perfectly. The analysis and prep paid off.
We got all of the strings on and adjusted the springs on the back to set the
bridge parallel to the top. It gives a little "pull up" and lots of
"dive bomb".
It took a while to set the action and intonation, but
it plays great.
|
 |
| We touched up the finish and
buffed it out with some 3M FinesseIt II. We left the trem cavity
unfinished. We're trying to see if the hype about letting the body
"breathe" really works. Probably not....
We installed a ground wire on the trem claw and ran it into the control
cavity. We reinstalled the pots, cleaned them with some Deoxit, and
soldered the ground into place.
Safety Tip: If you spray finish on a
guitar, use a round file to clean out the holes for the pots and switches
before you try to install them. If you don't it is very possible that
you'll break a big "chunk" out of the finish. |
|
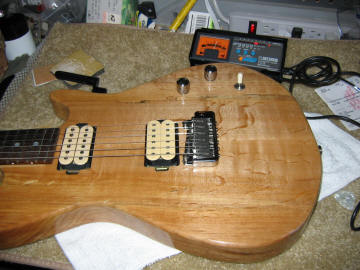
| Oddly, when we got it back
together we had to give the intonation another go. The guitar went
back together fine, but it needed a little tweaking to get into fighting
form. We installed the push-in trem arm and gave
it a test drive on a couple of different amps. The tone was still
great, and the trem makes a good guitar even better. The
Wilkinson-Mighty Mite trem is very nice, and the price is very reasonable.
We'll be using them again.
Now, back to playing! |
|
|
Back to Top |
