|
BUILDING THE MATTOCASTER! |
|
BUILDING THE MATTOCASTER! |
| Matthew, the youngest member of the Guitarattack Team, decided he wanted a guitar to learn on. He loves Stratocasters, but wanted it to be a Guitarattack Guitar. This is how it happened... | |
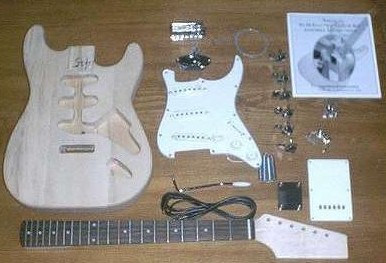
| Partially out of curiosity, partially out of economics...an eBay special. From the seller onlineguitar comes this gem. A far-east knockoff of the venerable Stratocaster. Everything required for an astounding $94 pricetag. The guitar arrived promptly, and we completed an inventory. Everything is there -- time to start!
|
|
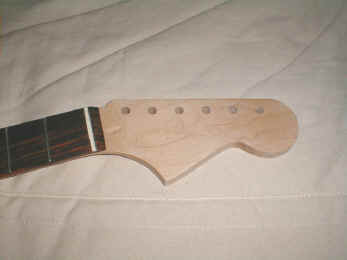
| Step 1: Finish the
headstock. Matthew decided he wanted a Strat-like headstock that was kind of 60's, kind of 50's. Here is the finished product -- note the curve is a little softer than a real Fender, but it has that old-time Bigsby look. |
|
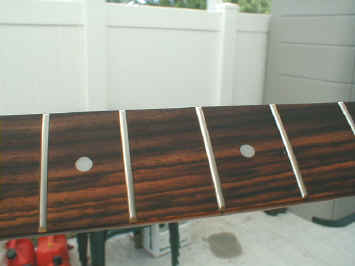
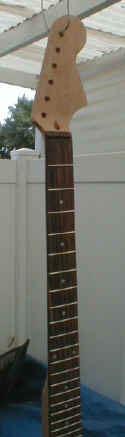
| Step 2: Do
something about that fingerboard. Rosewood? Maybe... Something else? More likely. The fingerboard was covered with a lacquer-like sealer and had some very strong, light brown "waves" running through it. We decided we had to fix the fingerboard to make the guitar look "proper".
|
|
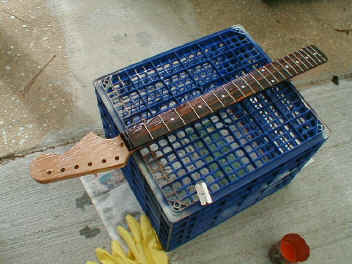
| Next we stripped the entire
neck, fingerboard and all with Citrusstrip from Lowe's. It smells nice and
fruity, and works a little slower, which is fine. You literally would not believe
how much "stuff" came off of this neck. When the stripping was finished, we weren't sure the neck was actually maple, either. |
|
| Step 3:
Once all of the old finish was off, we stained the fingerboard with ReRanch alcohol
stains. We achieved a uniform, rosewood like hue with Mr. Lester's Medium Mahogany
stain. After the stain was dry, we locked it in using Minwax Satin Poly -- the hand-rubbed kind. The poly allowed the "rosewood" to maintain a flat finish. The poly is very durable, and we'll watch it to see if we need to reapply. At this point we stained the neck with ReRanch neck amber to give it a good, old-time appearance. Watch this dye -- it is easy to spray too much and get it too yellow.
|
|
| Step 4:
Once the amber was on and locked in with a couple of coats of clear, we applied this cool,
custom decal. Custom made in the Guitarattack Shop with an inkjet kit from Micromark.com, this decal went on
pretty easily. Make sure you follow the directions to the letter -- we had a couple
of misfires. Yes, a MATTOCASTER...this is a one-of-a-kind guitar! Note the pleasing amber color on the headstock. |
|
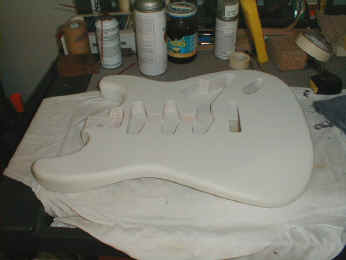
| Step 5: Oh
yeah...we have a body to worry about too. Here is a shot of the body with a couple
of coats of Zinsser's BINs primer per the ReRanch instructions. The body had a
primer on it when it arrived and it seemed pretty stable. Note -- this guitar is not
suitable for a clear finish! It had at least four pieces -- I actually lost count at
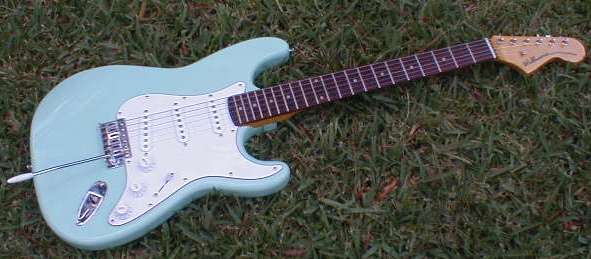
four. After we sprayed the body with couple of coats of Surf Green, we set the color with a coat of clear. Pretty uneventful -- follow the instructions on ReRanch. |
|
| Step 6: We buffed the body and neck just like we did with the Goldtop FM3 -- 3M FinesseIt II and our now-unreliable WEN buffer! After the buffing was complete, we couldn't wait -- we had to assemble the guitar. Here is a shot of the headstock with the tuners. The nut needed trimming, but the tuners and bushings went on easily. |
|
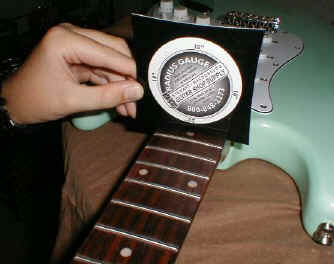
| Step 7: We followed the instructions for assembling the guitar. It was very easy because the electronics just snapped together -- no soldering required. When we got to the setup we were shocked to learn that the neck had a 20" radius. Not stock Fender, I must say. |
|
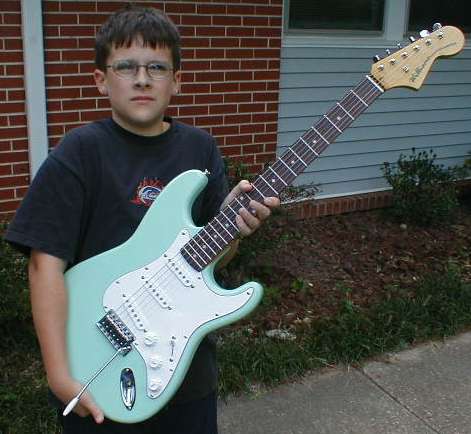
| Step 8: String 'er
up and play it! Here is a shot of Matthew, namesake of the Mattocaster,
with his new guitar. Matthew is just starting to learn, but he sure has a nice
custom guitar! Two weeks, a bunch of stripper, some ReRanch paint, and a little headscratching later, this is what you get. By the way -- we were shocked at how great this guitar sounded through Dad's recording rig. You just never know... |
|
|
|
| ATTACK HOME | BUILDER'S GALLERY | ||||||||||||||||||||||||||||||||||||||||||||||||||||
|
|||||||||||||||||||||||||||||||||||||||||||||||||||||