| The history lesson....my friend Ken promised
that he would send me a guitar to "fix-up." This initially started as his desire
for a rewire on his St. Blues guitar, but we never could get together. In March 1997, Ken
called me and told me he had a "basket case" Les Paul that had come into his
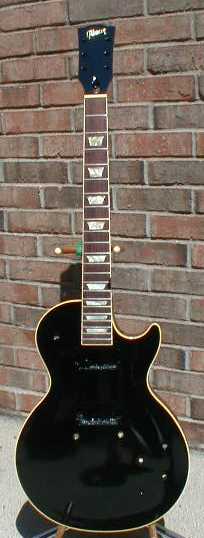
store. I was immediately intrigued, so I told him to send it to me. The guitar arrived to my house at in early April 1997. My wife picked it up at the post office and was immediately alarmed: she thought I had bought another guitar from Ken! When I arrived home from school, the box was waiting for me--I was very excited. My son and I opened the box, and I could not believe what I saw. The guitar was in an inner "Samick" box, filled with shredded newspaper. I took it out on the front porch of the house and cleaned out the guitar. The guitar was clearly a Les Paul Standard or Studio, but the binding present on the neck and body confused me. However, the guitar’s top was stained light red - it had one creme-colored humbucking pickup in the lead position, and no pickup in the rhythm position but there was a ring screwed into the top. A black pickguard was screwed into the top (no bracket), and a cheap Kahler Spyder tremolo bridge was installed. The previous owner had hacked the holes into the top with a chisel or screwdriver, and attached the tremolo with two oversize wood screws. The back of the body was badly cracked, and had no finish applied. There were only two pots in the guitar -- no switches or covers were present. The neck was nearly completely destroyed. Sighting down the neck, it was clear that the neck was not at the proper angle -- it actually rose from the guitar. The heel of the neck had been broken, and several large pieces had been glued back in. There were numerous cracks in the wood, and it was clear that the neck had to be removed. There was not a clean joint between the body and the neck; rather, there was a huge gap between the two. The frets had never been dressed, and the binding was pulling away from the neck between the 12th fret and the butt of the fingerboard on the treble side. The previous owner had ground the binding away from the first three frets. The headstock was severed and re-glued between the low-E and high-E tuners. There was actually a furrow between the points. However, the Gibson and Les Paul logos were still intact. The previous owner had installed generic, gold-plated keys. They were marked "Japan" on the back. Overall, the guitar was unusable--it could not be played in the condition in which it arrived. When I surveyed the guitar, I was convinced that it could never be played. I surmised that it would probably best serve as a training aid for refretting. The following is a chronology of how I restored the guitar. 1. I removed all of the hardware from the guitar. 2. I rigged-up a stopper, a piece of fuel line, and an air needle to a teapot. I used the apparatus to steam the neck out of the guitar. 3. Once the neck was out, I started work on trying to align the neck. First, I cleaned all of the glue out of the tenon. I then evaluated the fingerboard to figure out a way to make it level. I clamped the neck, fingerboard down to my desk. It became clear that the fingerboard had pulled away from the neck, and the neck/body joint was incorrect. I ordered the Les Paul blueprint from Stew-Mac to get the angles right. 4. I stripped the finish off of the guitar using "Zip Strip." I could see that the wood underneath the finish was in pretty good shape--actually, Birdseye maple. I drew a square over the large Kahler hole, and routed it out with my Dremel tool. The damage was incredible, and I routed trough the maple to the mahogany core. Once the hole was squared, I cut a piece of maple into a square and glued in the hole. Once the glue was dry, I scraped the patch level. Lesson Learned: Maybe the square patch is not the way to go -- they tend to telegraph through. In retrospect I should have used regular auto body putty to cover the joint -- a technique used by the Apprentice Shop. 5. Once the Kahler patch was complete, I routed the front humbucker cavity. Lesson Learned: Do not assume the screw holes left from a previous job are aligned, as with the pickup rings. The body was banged up but pretty complete at this point, and I set it aside. 6. I made a series of cardboard templates from the Stew-Mac Les Paul blueprint. These allowed me to set the angles for the neck. I sawed off the bottom part of the tenon and laminated a new piece of mahogany. I used a number of dowels in the neck to top cracks, and injected epoxy into the exposed cavities on the bottom of the neck. I also used super glue to seal cracks. Lesson Learned: Run super glue along all exposed cracks to ensure they will not pull apart during the finish. 7. Once the neck tenon was set to angle, I concentrated on fixing the headstock. First, I filled the hole with body putty and taped off the logo. Next, I shot the headstock with black lacquer. I was surprised to see every imperfection show through. After a series of paint/sand/repaint, I finally got a pretty smooth finish. At this time I fixed the binding on the neck and sanded it smooth. Lesson Learned: I put some binding in acetone and fixed the first three frets with the resulting "goo." It worked great but beware -- the acetone can really screw up the binding. 8. Once the headstock was in pretty good shape, I trial fitted the neck to the body. I had to ensure the neck attached at the proper fret, and that the angle of the top and neck were in coincidence. The angle looked good, but the body/neck joint was incorrect. Lesson Learned: I took Saran Wrap and covered the body side of the joint. I stretched it very tight and taped it to cover the entire area. I spread a large blob of Elmer’s wood putty on the neck side of the joint and pressed the neck into the mortise. I clamped the neck in its place and used a dull razor blade to square off the putty, forming a clean joint. Once the putty dried for a couple of hours, I unclamped the neck, untaped the Saran Wrap, and slid the neck out of the joint. The Saran Wrap pulled right off of the putty, and revealed a smooth neck joint. I tried the fit of the neck again, and it was perfect! I sanded the joint smooth and covered it with super glue. 9. Once the neck joint was complete, I checked the angles and glued it to the body. I let the body dry for two days. Once the neck was in and dry, I completed a fret job, including gluing in the nut. First, I leveled the frets with a mill file taped to a block of wood. Second, I rerounded the frets and sanded them down. Third, I cleaned the wood on the fingerboard with steel wool. 10. I measured the scale for the neck and installed the studs for the bridge. It is at this point that I decided to make the guitar look like Jeff Beck's. Interestingly, I wanted to ensure I could save the guitar before I decided what it should look like. I installed the ground for the electronics in the treble side stud. Once the studs were set, I installed the strings and set up the guitar. I worked the frets until the guitar played well and removed the hardware. Painting could begin. 11. I started with Stewart-Macdonald’s Sanding Sealer. I taped off the binding, fingerboard, and headstock and painted the entire guitar. Once I shot the entire guitar, I wet sanded the sealer to remove low spots. Lesson Learned: Fog a coat of the color coat if possible. I left a lot of low spots. Lesson Learned 2: Use a felt sanding block -- I left some furrows. 12. Once the sanding sealer looked smooth, I painted the headstock. I completed work on the headstock prior to the rest of the guitar because I was not convinced that I could save the logo. Once I got the headstock looking presentable, I retaped it and started shooting black. I sprayed two cans of black on the guitar. I had to do some sanding in between coats for spots and low places. Once the sanding was complete, I scraped the binding, retaped, and switched to clear lacquer. I sprayed almost three complete cans of clear lacquer on the guitar. Lesson Learned: The Jeff Beck Les Paul didn't have a logo anyway! Also, the tuners I put on were not correct -- I should have used Schallers. 13. I let the guitar dry for one week, and I wet sanded with 600, 1000, and 2000 grit papers. I was not happy with the results, so I contacted a luthier friend. He let me use his pedestal-mounted buffer, and the results were remarkably better. 14. After buffing, I put all of the hardware on the guitar and strung it up. I found an original late 50's tailpiece at an older music store -- it is a featherweight and cost me…are you ready…$5! 21 June 97: Final buff at Custom Fretted Instruments in Sparta, TN and assembly. Lessons Learned: 1. Take your time. 2. Take your time more. 3. Always analyze the problem and think through the solution. 4. Ensure you define your end state; you'll be a lot happier. 5. For a project like this one, write down your objectives on a piece of poster board and post it in a prominent place. Trust me. UPDATE 1: I've stripped and repainted the guitar black. It is currently (as of December 1999) drying, waiting for another round of clear lacquer coats. The binding was aged by master luthier Jim Grainger, and a new headstock veneer was installed. I will post photos of the new guitar when finished -- you'll be happy with the results. UPDATE 2:
|
||||
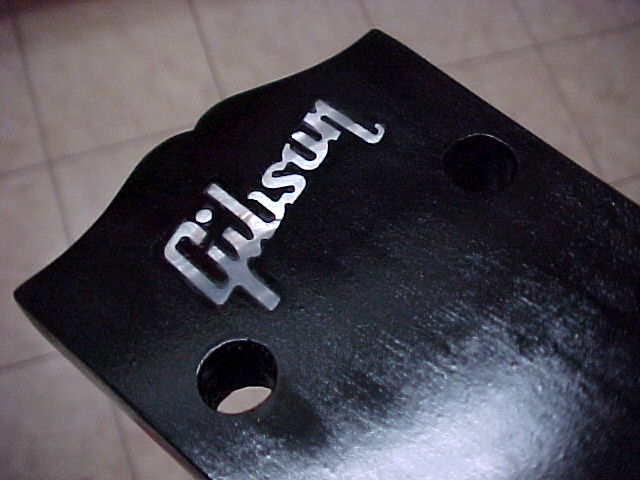
| FINAL UPDATE DECEMBER: Click here to see the final product...yes, it is done! |