|
THE ATTACK
FM DOUBLENECK
PROJECT! |
| No one can remember exactly how the
subject of double neck guitars came up. Perhaps it was at Karaoke Night at the
club...or during a dart outing...or during one of our numerous cookouts...or maybe that
Halloween Party... We do recall that it had something to do with "Stairway to
Heaven" and "2112". When we finished the doubleneck for our friend/mentor Thomas H., it was clear that a project of this magnitude was not for the faint-hearted. What started as a simple man-challenge turned into a huge, albeit extremely satisfying effort. During a recent "clean that
closet out now" weekend, we rediscovered our FM doubleneck body. With
little more than a pencil and piece of poster board, we started on the
project. Here is how it went down, and we hope you enjoy it. |
|
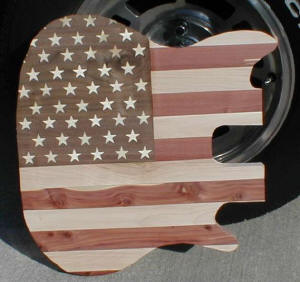
| Here is a shot
of the body as it was received from Thomas. For a recap, the dark wood
in the star field is black walnut; the stars are aspen; the red stripes are
cedar; and the white stripes are ash. The body is approximately 1.5 inches thick and is very well made. Note the "neck attachment points". Because of the shape of the FM3, these would turn out to be pretty great. The first step was to wipe on a thin coat of shellac to protect the body during the routing phase. |
|
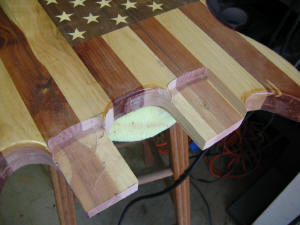
Here is a shot of the body with the neck cavities roughed out. You can see that, through an incredible amount of foresight by Thomas, there is plenty of wood left on either side of the neck to get a good neck cavity. Using a Stew-Mac template and a patter following bit, we roughed out the cavities. |
|
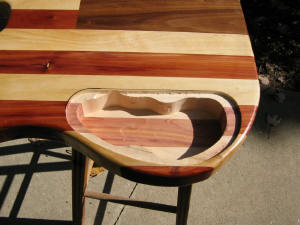
| Using a sanding drum on the drill press we trimmed the sides of the neck cavities down to size. We won't complete the final trimming until the necks are done. Note the "center line" marks on the body. We used these with a "laser" line to align the template properly. |
|
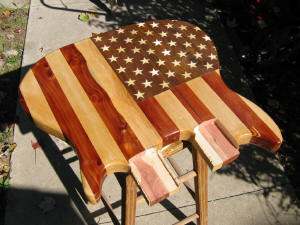
| Here is a shot of the back.
We routed out the control cavity prior to working the necks because we
already had the router out and setup with the pattern following bit.
You can still see a little bit of the Sharpie marker on the body. Safety Tip: Do not use Sharpies or other marker to mark guitar bodies! Only use pencil. I had to sand this mark off. Luckily, there was a thin coat of shellac on the body that kept the marker from sinking into the wood! |
|
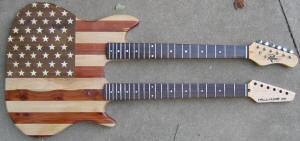
| Here is a mockup of the guitar with two necks -- a Williams GS neck and a Rogue neck from our pickup testing guitar. Killer! The final guitar will have a 12 string on top and a 6 string on the bottom. |
|
|
|
| Next up is to
finish the necks, get them aligned, and install the bridges.
Go to Page 2 |
|
| Back to BUILDER'S GALLERY | ||||||||||||||||||||||||||||||||||||||||||||||||||||
|
||||||||||||||||||||||||||||||||||||||||||||||||||||